ENGINE STRIPDOWN
1 Remove head
Reach for the hand-cleanser, it'll soon be required! Also keep plenty of rags close by - and an Elastoplast or two (for skinned knuckles!) - ready? OK, then, let's make a start.
With the engine on the work bench (preferably held firmly) remove the carburettor, then the gear lever and kick-starter. Start as you mean to go on and place the parts somewhere safe and in a logical order. |

Undo the four cylinder head nuts, placing them with the washers in a suitable container.
Lift the head, tapping it lightly with a rubber mallet if it is stuck. |
Sometimes the cylinder head gasket will stick to both mating surfaces, making it difficult to lift the head - but, please persevere and don't be tempted to wedge a screwdriver to gain leverage - you could damage the head!
Carefully ease the barrel up over the studs, taking care not to damage the piston. Place the barrel, cylinder head and nuts and washers away from the work area. |

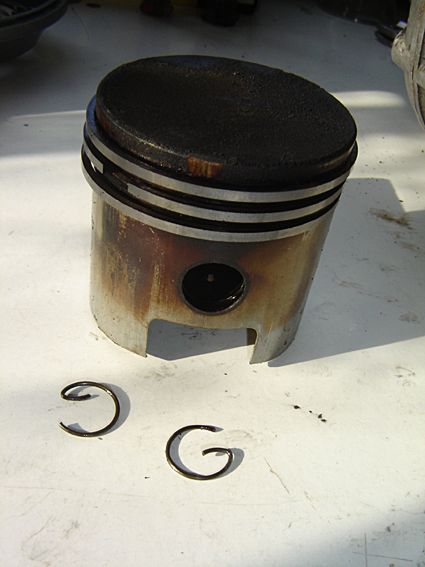
If your piston looks like this, it may need replacing!
|
2 Remove pistonCarefully undo four the studs (I use a mole wrench, but very carefully!), then remove them and screw the nuts back on.
Place them with the head. Next, stuff and oily rag into the mouth of the crankcase (for obvious reasons!). |
Remove the spring circlips on either side of the gudgeon pin, and press out the pin.
It will be tight, so resist the temptation to use a hammer and drift! Warm the piston first using a clean rag soaked in boiling water, or maybe play a hot-air gun on it for a few moments. Don't melt it though! |
|
This piston may need replacing!
It certainly requires a good decoking and a new set of rings! And as for the circlips - chuck 'em away - NEVER re-use old circlips. Always obtain some new ones! You just don't want to know what happens if one fails.... been there, done it, read the book...! |
3 Remove clutchBefore you start, if you haven't already drained the oil from the gearbox do so NOW!
The drain plug is underneath (the larger of the two - the small one is to drain excess fuel out of the crankcase!), and it's best to use a suitable-sized socket. And do try to keep the oil off your hands as it isn't at all healthy! Remove the gear lever first, followed by the kick-start, put the bolts back through the respective holes, tighten the nuts and place the parts away from your work area. |

Undo the 5 screws holding the clutch cover in place (noting that they are of different lengths), and remove the cover.
Take care, as some oil will still be present! I suggest replacing the screws in the respective holes in the cover. |
A flimsy paper gasket will usually come away with the cover; but discard this and get a new one.
This is what you will see with the cover off. 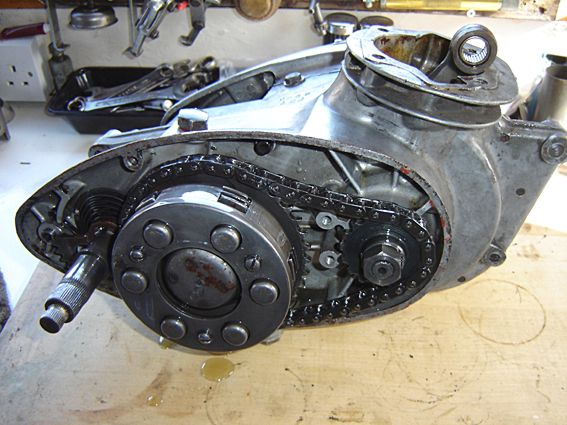
|
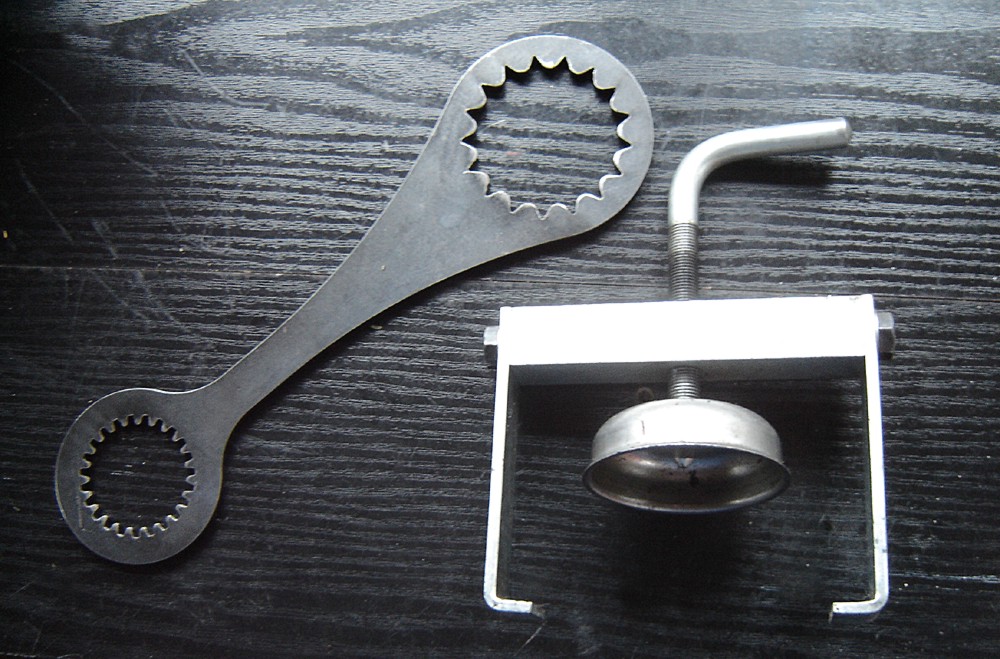
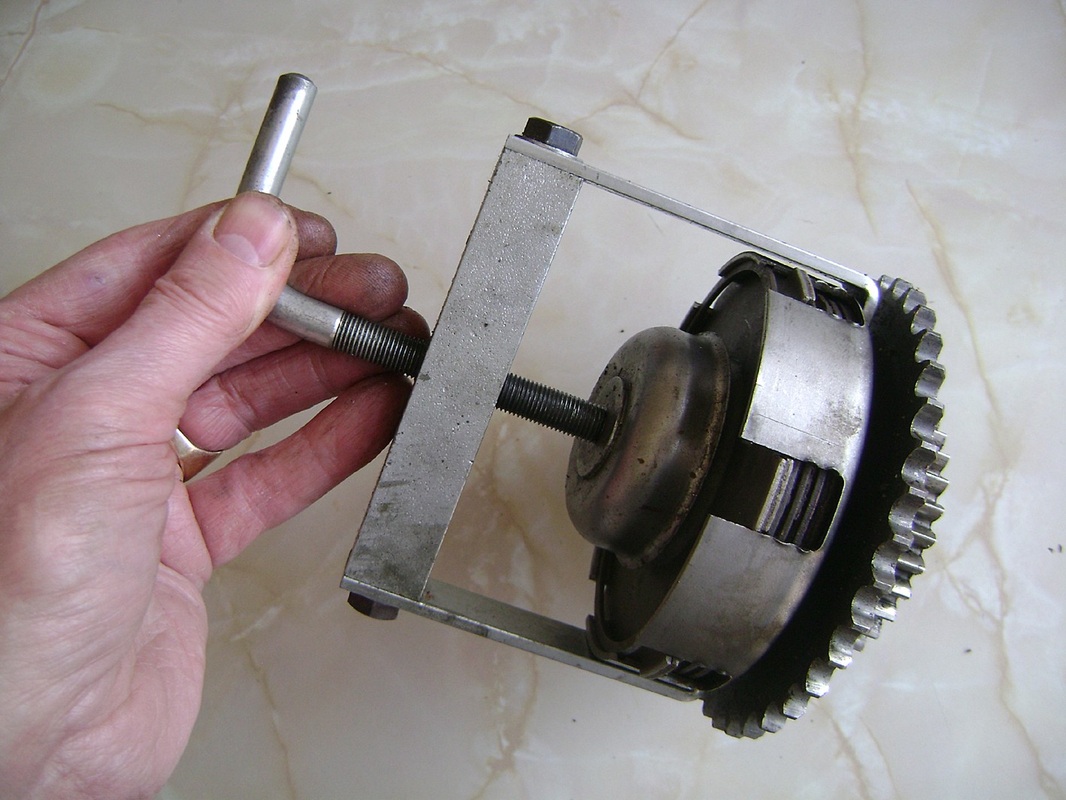
Special toolsTo proceed, it is advisable to have a couple of special tools (seen above) - obtainable from eBay, which will definitely make life easier!
On the left is a spanner for holding the engine sprocket and clutch centre (both difficult to undo without), and a spring compressor to relieve the spring pressure on the clutch. Try Rex Caunt Racing for these tools: www.rexcauntracing.com |
4 Clutch stripdownFirst, remove these three screws and lock-washers to remove the clutch cover plate.
Then fit the compressor under the clutch drum (between that and the chain wheel) and apply pressure.
This is just to show where to locate the two feet of the compressor.
|
When the springs have been compressed sufficiently, very carefully prise out the large spring circlip.
Then carefully release the compressor. Remove the clutch pressure plate, the six cups and springs, followed by the clutch plates. Then take out the spring link in the primary chain and remove it. If there's no spring link you'll have to remove the clutch drum, primary drive chain and sprocket together at a later stage. 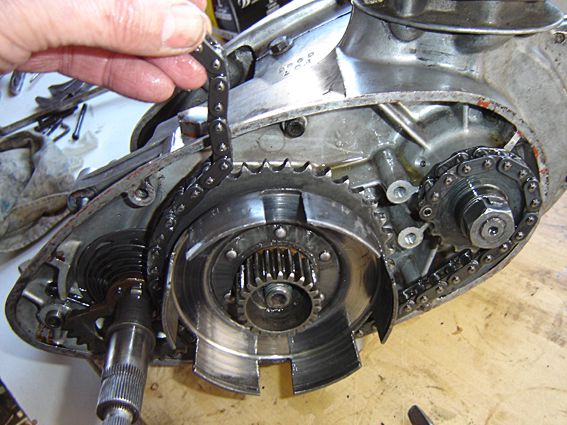
|
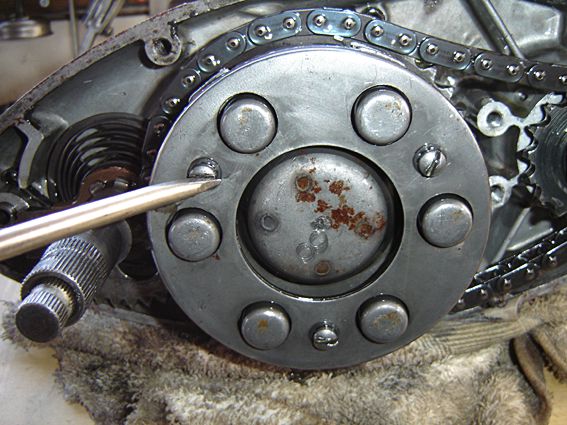
Now undo the clutch centre nut, locking the clutch centre in position using the special spanner (seen below in position).

Remove the clutch drum.
And below are all the parts, more or less in order. Take care not to lose the mushroom-shaped short clutch rod. 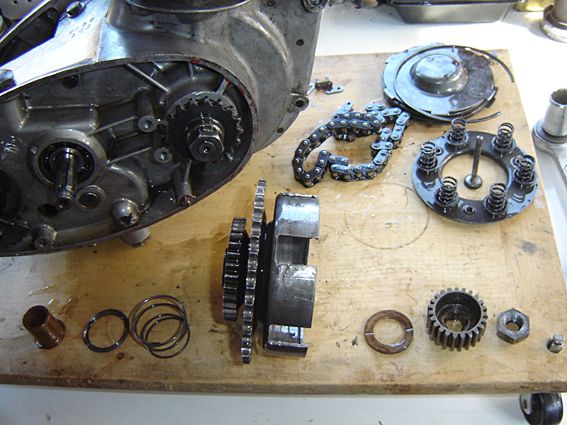
|
Next, undo the engine sprocket, again using the special spanner to lock the crankshaft in place.

The sprocket is on a keyed taper and may be reluctant to budge. A three-legged puller may be required here! Keep the woodruff key safe somewhere!
Warning: the part below (spring cup 90-40) is prone to wear and may need to be replaced. Obtainable from www.rexcauntracing.com . 
|
5 Kick-starterNext, remove the kick-start mechanism keeping all the components together.

After releasing the spring from its lug on the crankcase the assembly just pulls off. It's always a good idea to replace that return spring, though! If it breaks, the kick-starter won't return and that means taking it all apart again!
|
6 Magneto sideFirstly, remove the generator side cover by undoing the two large screws at the front and a smaller one at the rear to the left of my thumb.

Place the cover nearby as it will make a useful container for other bits and pieces.
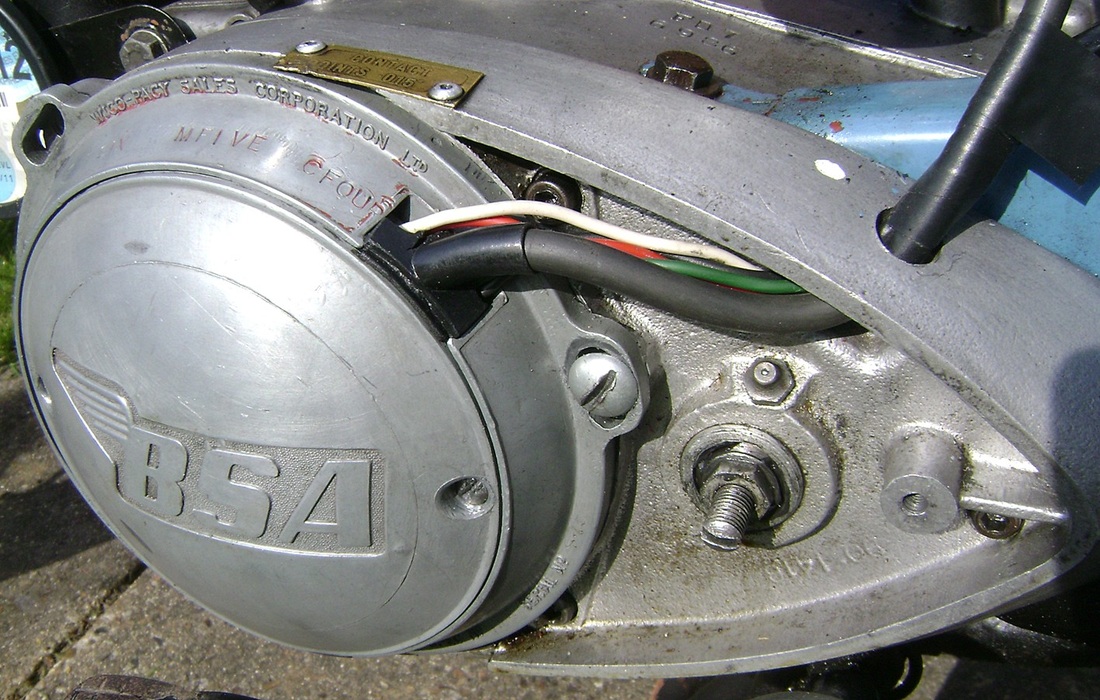
With the cover off, this is what you should see.Undo the two *small screws and remove the round cover. (*Put them safely out of (h)arms way!)
|
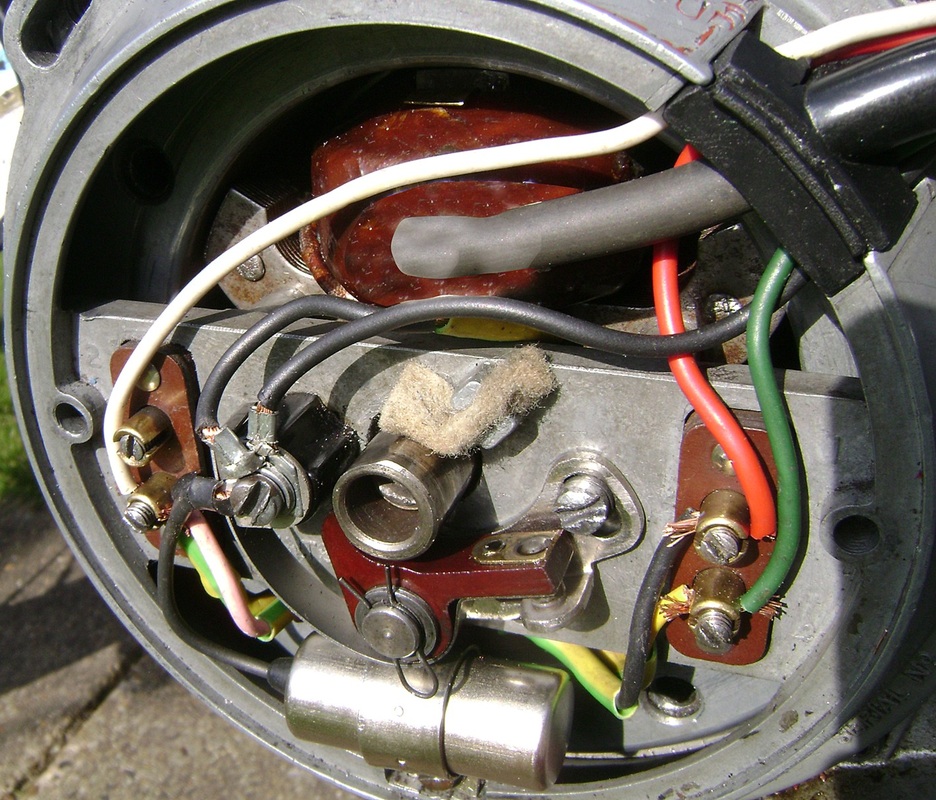
After removing the round cover the stator plate assembly can be seen (above).
Before removing the stator plate assembly scribe aligning marks on the periphery and the crankcase to retain timing when re-assembling. Next, undo the small screw from the centre of the contact breaker cam, and remove the cam. Note: the cam is keyed onto the crankshaft - take care not to lose the very small key! 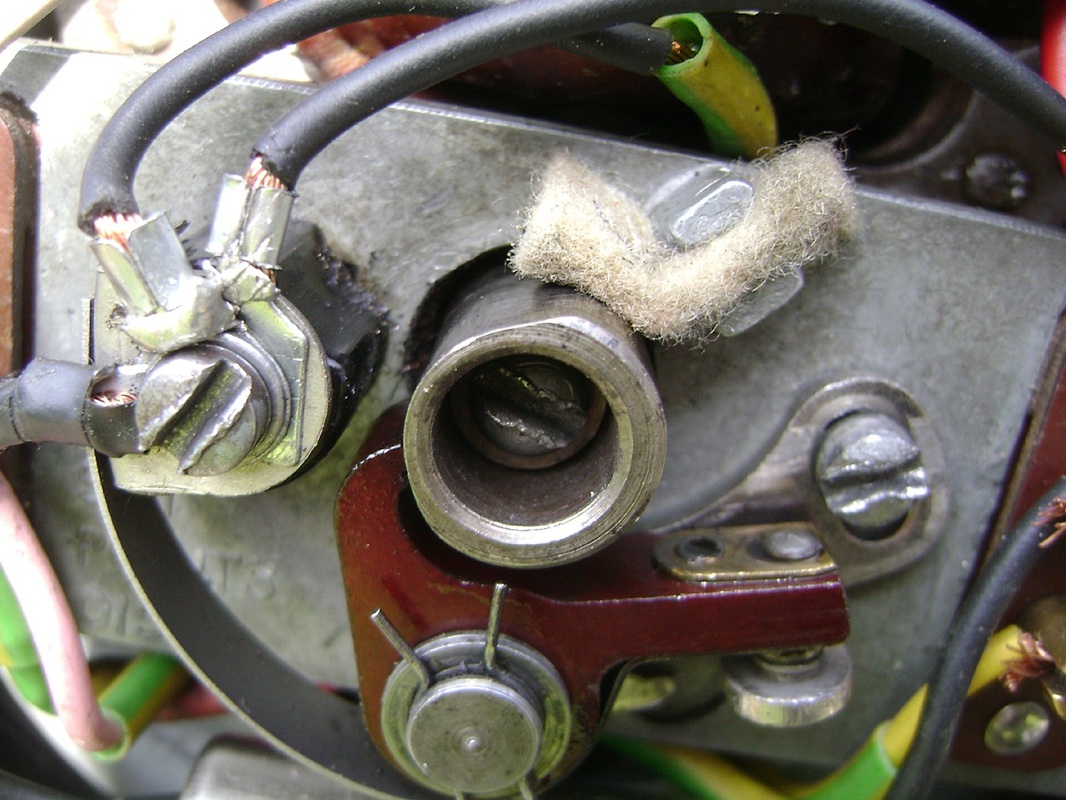
|
Then undo the screw holding the stator plate assembly in position (two were removed with the outer cover).
Before the stator plate assembly can be removed, the wiring coming from the coils etc has to be split at the connectors found in the battery compartment. Having done that, ease the wiring through the hole in the generator cover then place the stator plate assembly and wiring to one side. |
7 Remove flywheel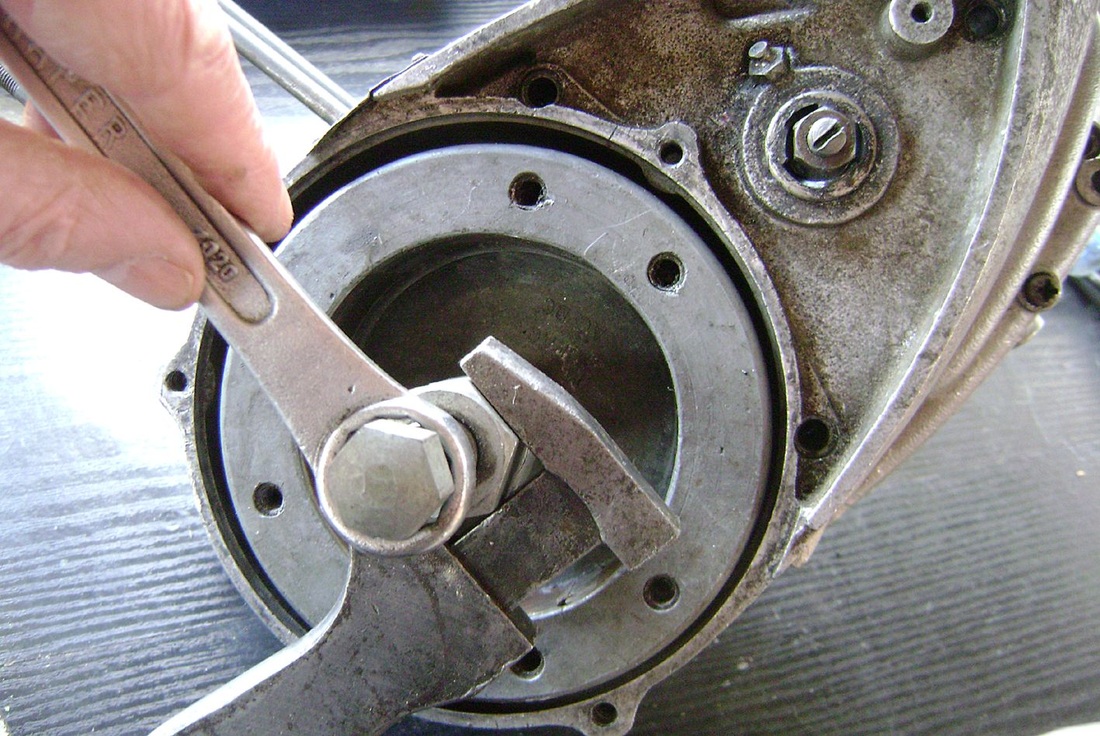
With the stator plate assembly and the covers safely stored away begin by undoing the flywheel.
The flywheel is keyed onto the left-hand crankshaft and retained by a large central nut (right-hand thread) and lock-washer. |

It's best to use a special tool here to break the taper as the flywheel is a tight fit.
|
With the flywheel off, remove the woodruff key and put it in a safe place with the flywheel.

Now undo the five screws holding the inner cover in place - two on the left of the generator housing, two to the right, and the final one next to the clutch adjuster screw.
|
Lift the inner cover away, complete with the clutch mechanism, giving access to the final drive sprocket .
|
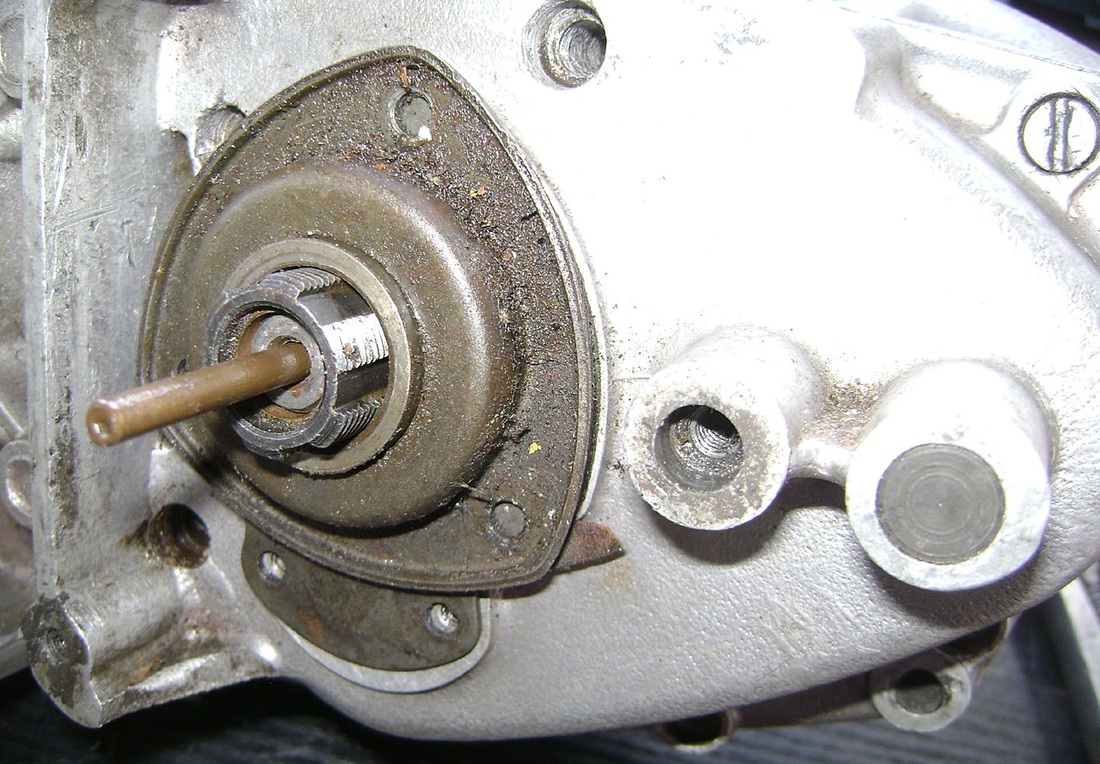
8 Remove sprocketKnock back the locking washer then undo the large sprocket nut (left-hand thread!).
Remove the drive sprocket from the splines of the main-shaft. Here's a tip: wrap the chain around the sprocket and clamp it in a vice (or mole wrench) to enable the nut to be undone! |
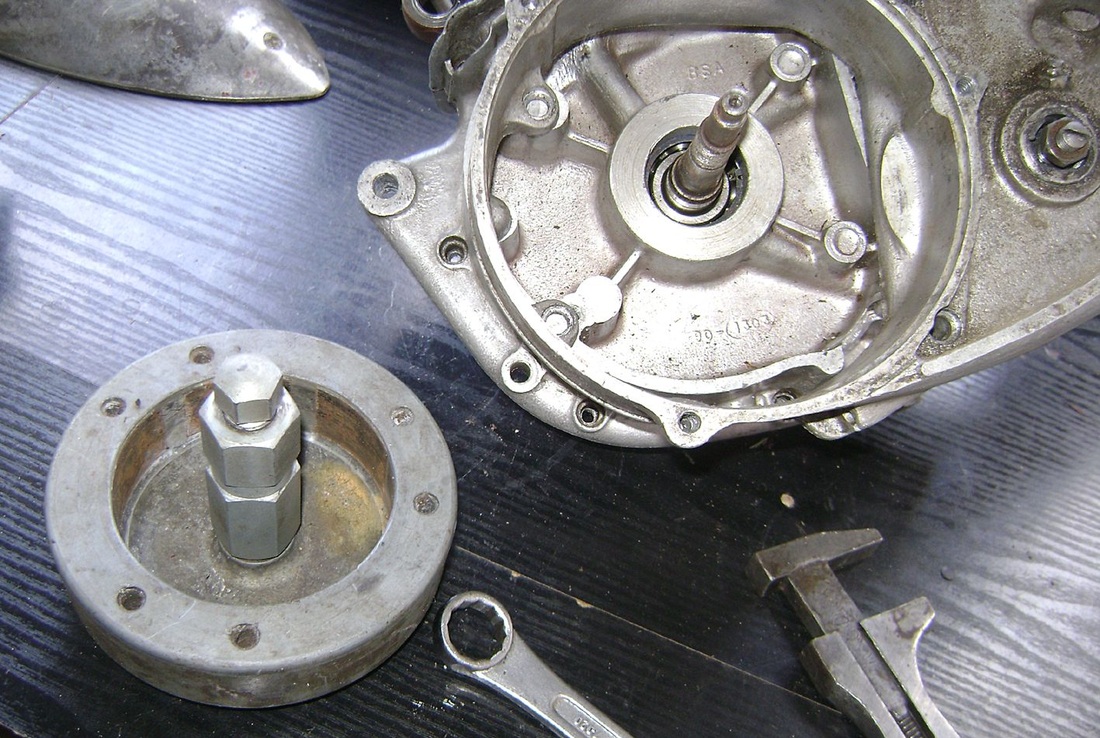
Next remove the final drive oil seal assembly.
Undo the five screws holding the assembly in place and put the parts to one side. |

Here's the oil seal assembly stripped down into its component parts:(clockwise from top left) paper gasket, bearing retaining plate with its paper gasket, distance collar, oil seal housing with seal.
|
I've shown the clutch operating rod in the left-hand picture for effect, as it should still be inside the main-shaft.
Keep it in a safe place with the ball-bearing that may also fall out of the operating mechanism! |
9 Splitting casesBefore we can split the crankcases there are a number of screws to remove!
But, beware, they are of different lengths so make sure you make a note of where they go for later when you tackle the rebuild! And don't forget there's one on either side of the cylinder base! |
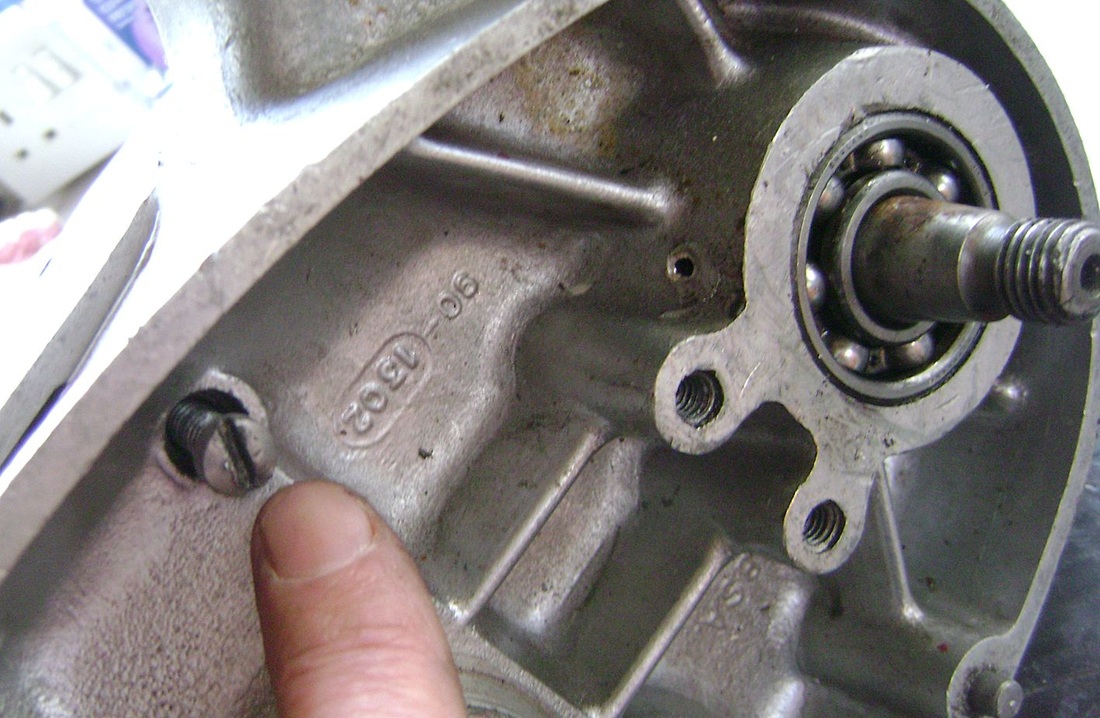
And, just to catch you out, BSA put another one on the clutch side of the crankcase (above) - you certainly won't split the two halves without removing that one!
|
Once all the screws are out it's time to try your hand at splitting the crankcase. But before you do, have you remembered to remove the woodruff keys from both ends of the crankshaft? If not, do so now.
It's going to be easy, but just persevere - tap the crankcases with a rubber mallet... easy now, don't damage the aluminium! Use a screwdriver to prise the halves apart? Don't you dare! Keep tapping, they'll give sooner or later. |
And this is what you'll see.

A simply layout,isn't it?
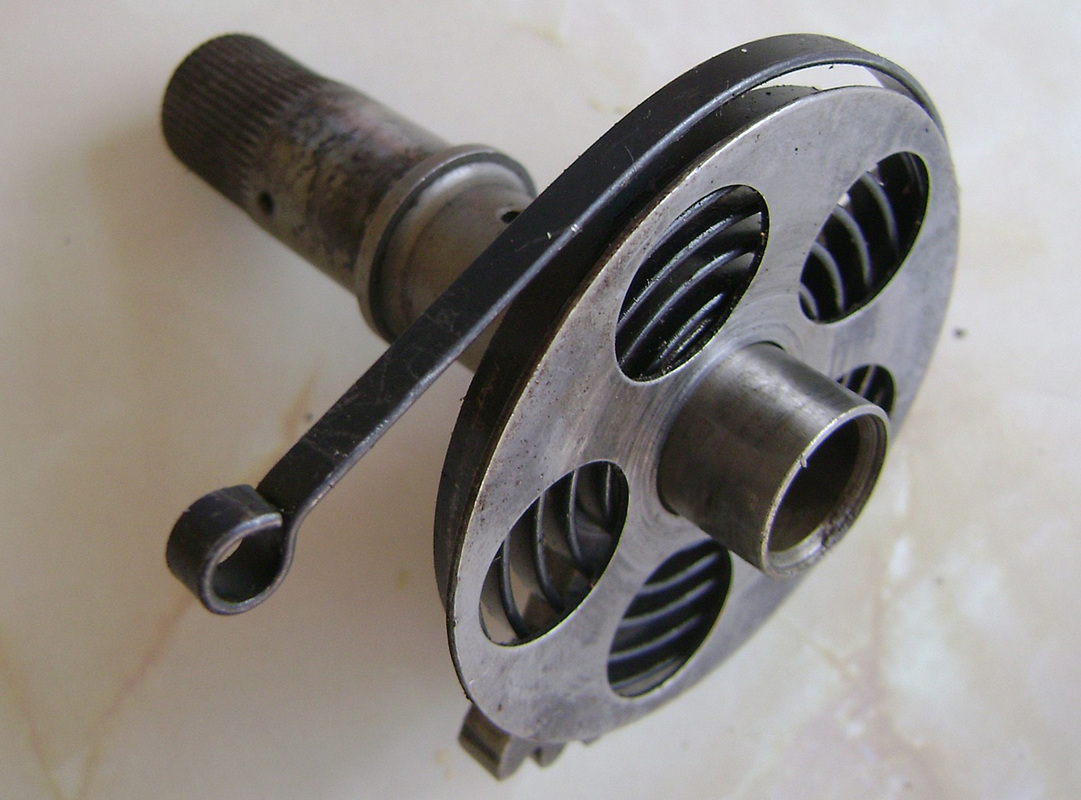
Remove the crankshaft and put it to one side, then turn your attention to the gears. |
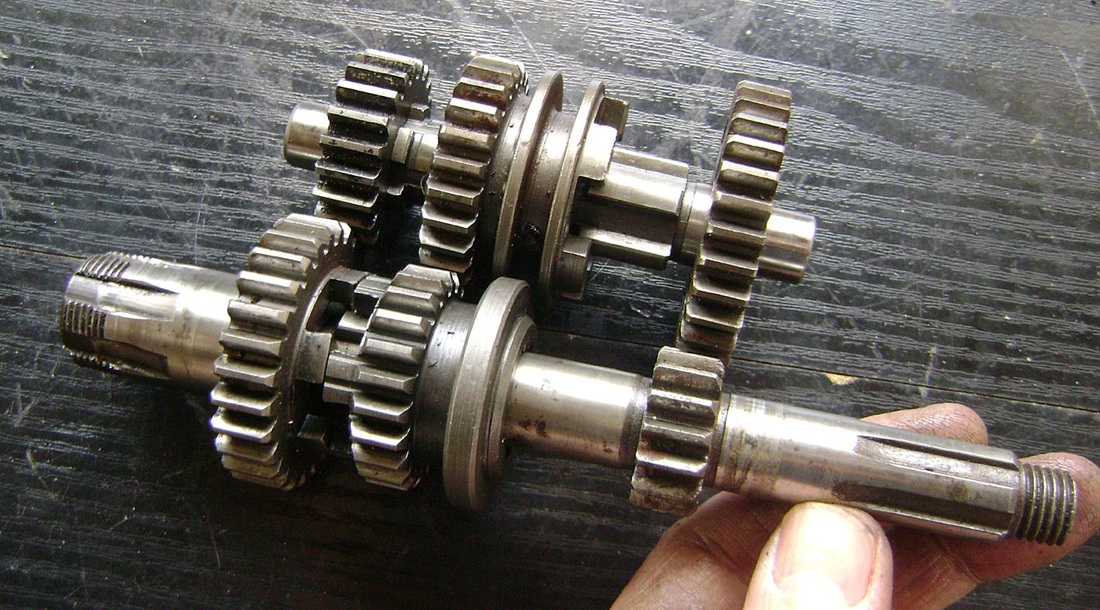
10 Remove gearsMy D7 engine is a three-gear model, and once the gears have been removed this is what they should look like when assembled in mesh on the workbench (see below):
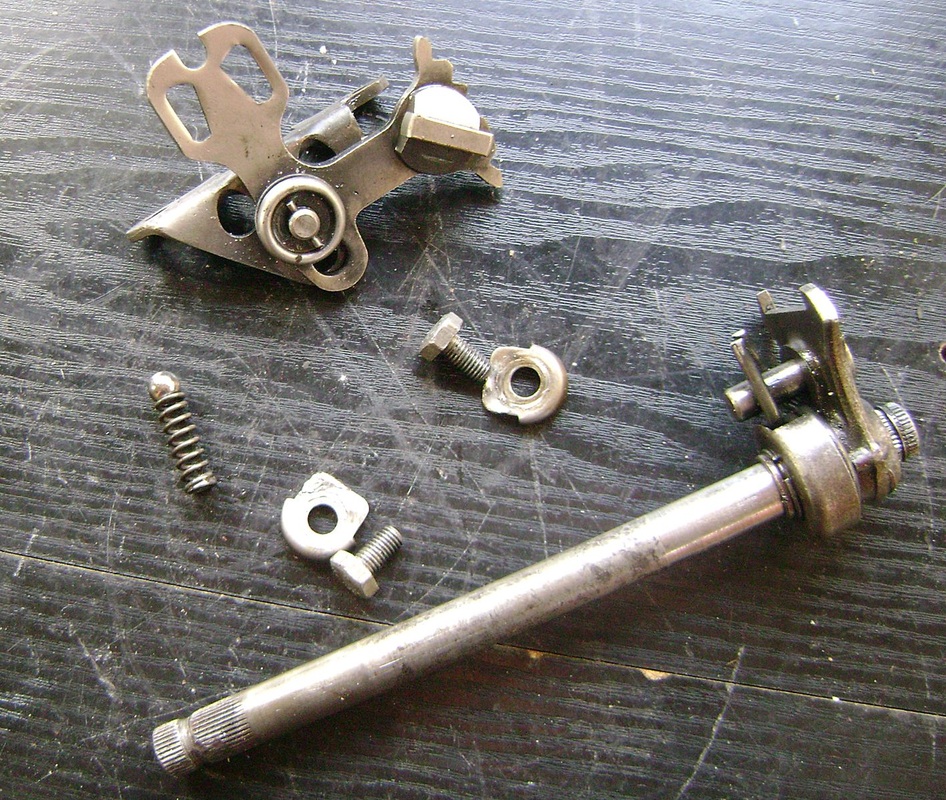
Now remove the gear change spindle and put it to one side.

|
Knock back the tab washers then undo and remove the bolts holding the gear indexing cam plate mechanism in place,
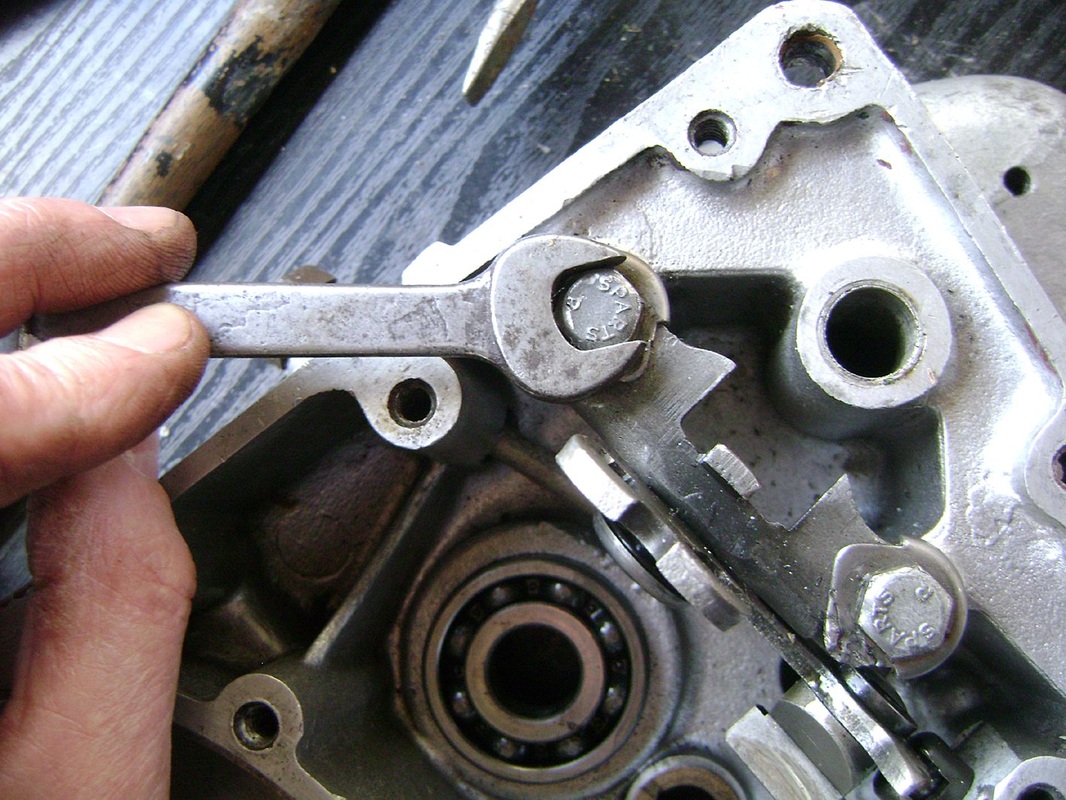
Watch out you don't lose the cam plate plunger ball...
|
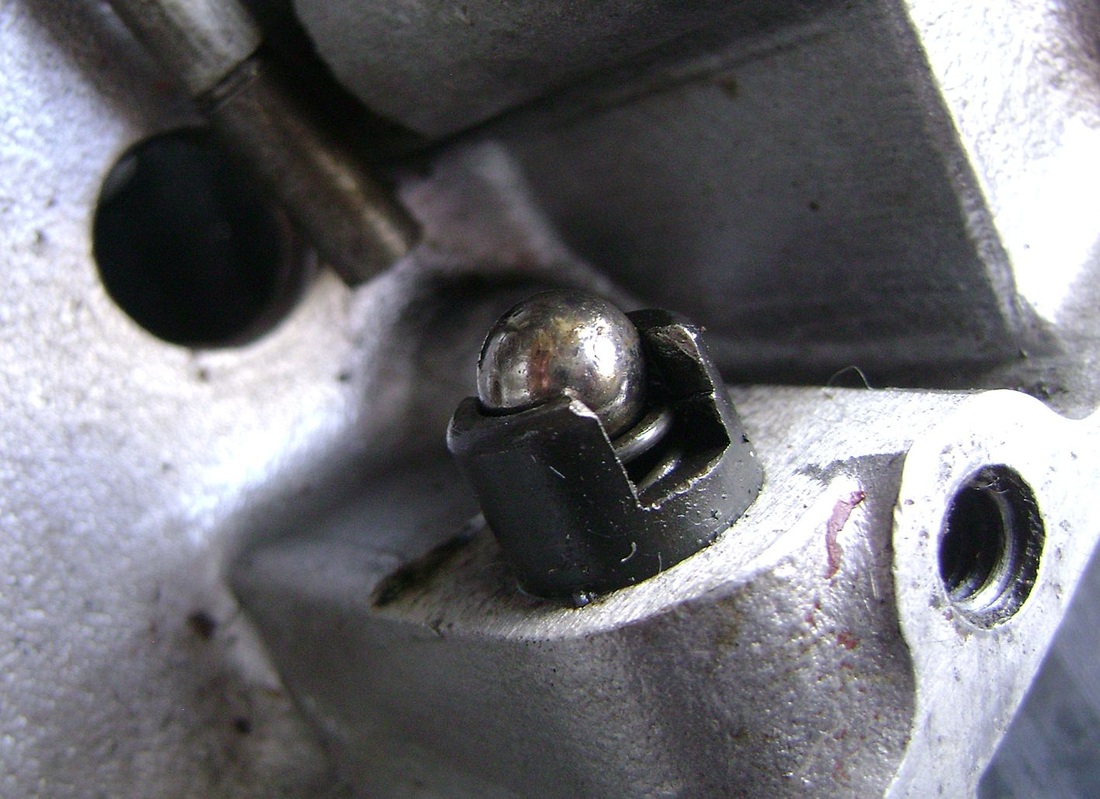
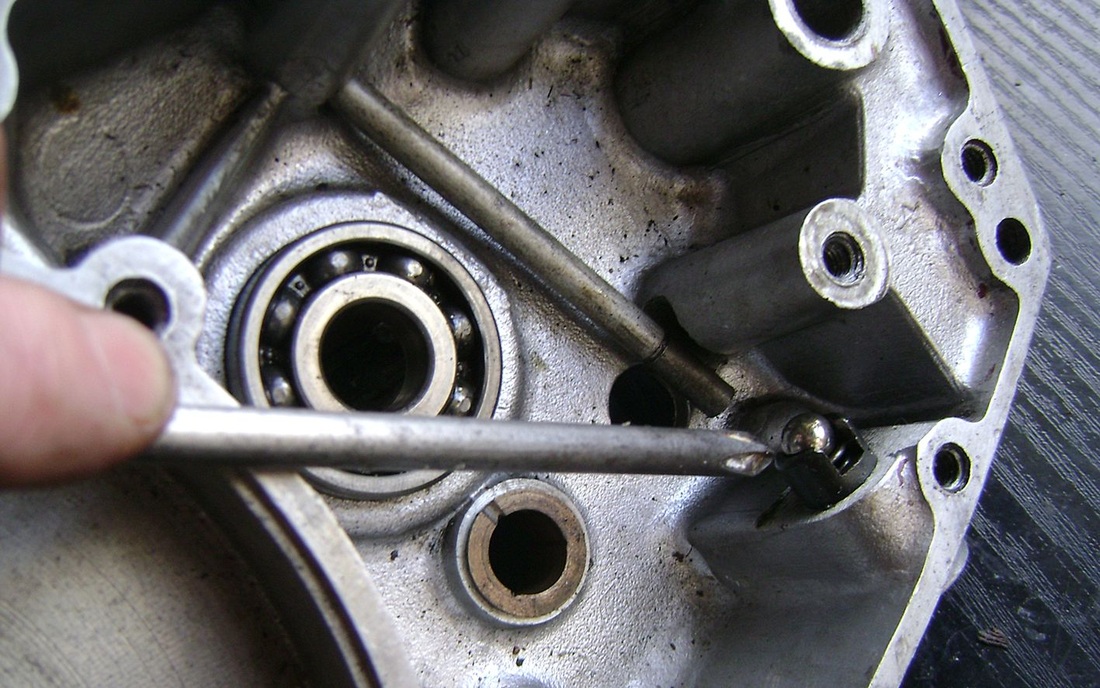
In this enlarged view you can just see the spring under the ball bearing.
Try not to lose either of them! 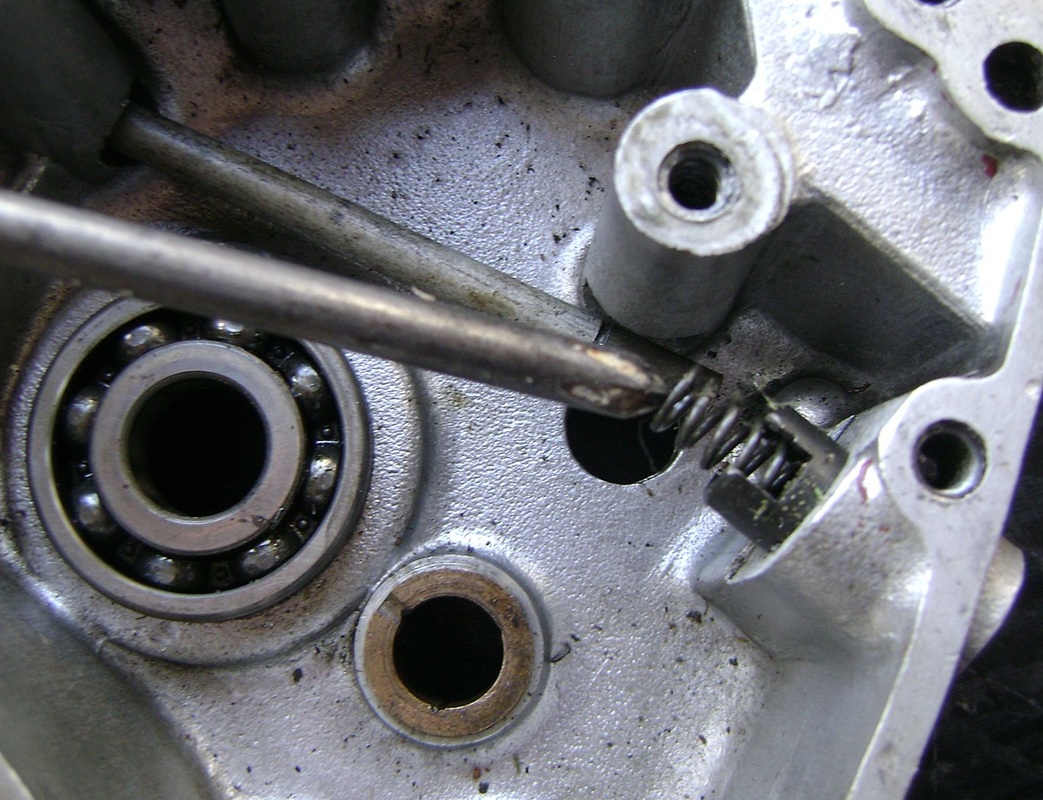
|
And here's a view of all the component parts making up the gear change mechanism.
With the crankcases split it's now time to give them a good 'Gunk down' before removing the old oil seals and bearings.
But more of that later - I think I deserve a beer or two now, don't you? |
